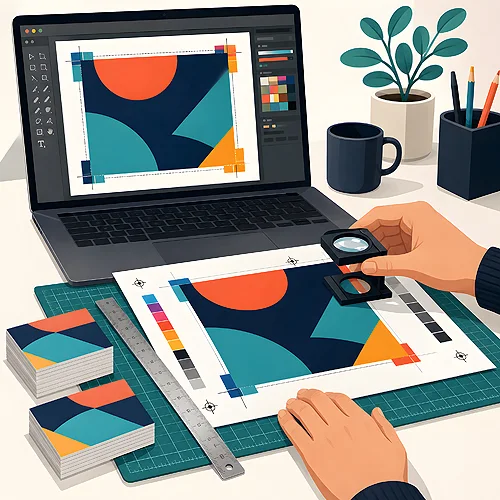
Plotter cutting sounds technical, but it comes down to one simple thing: the machine has to know where to cut the material all the way through and where only to press a groove so it folds neatly. You cannot see that on a pretty design - it has to be written into the file as separate lines. When they are there, the carton folds exactly as you planned. When they are missing, the file goes back for correction and production waits.
You do not have to be a designer to prepare such a file. It is enough to understand three ideas - the cut line, the crease and the bleed - and then keep them consistently apart. The rest is plain tidiness: clear layer names and one sentence of description for the printer.
- A plotter does not recognise the shape from your artwork - it needs a separate outline saved as a vector.
- You send two files: one for printing with artwork only, one for cutting with nothing but lines. The print file must carry no cut lines.
- A cut line goes through the material. A crease is a fold position where the material stays in one piece.
- Cutting and creasing use agreed colours: red for the cut, cyan for the crease. Every line is drawn as a hairline.
- Bleed is artwork extended beyond the outline so that no white sliver appears at the edge after cutting.
- One sentence of description in your message to the printer saves a whole round of questions.
What the plotter actually reads in your file
A flatbed plotter works like a very precise hand holding a knife: it follows exactly the path it was given. It does not look at the artwork and does not work out where the box ends. It reads vector lines, that is curves described mathematically rather than drawn in pixels.
That is why you need two separate files: a print file with the artwork only, and a cutting file with nothing but the cut and crease lines. The first is for the printing machine, the second for the plotter. Those lines must not appear in the print file - they would come out as visible strokes on the finished pack.
- The print file - everything that is meant to print: backgrounds, photos, logo, texts, codes. No cut or crease lines.
- The cutting layer in the cutting file - the outline of the finished element plus any openings, for example a window or a slot for a hanger.
- The creasing layer in the same cutting file - the fold lines along which the material folds.
The rule is single and very simple: one function means one layer. Everything else follows naturally from it.
Cut line and crease - the two things easiest to confuse
The cut line
The cut line is the outline along which the knife passes through the material. It defines the final shape: the outline of the box together with its tabs, a round sticker, a window in the packaging. Draw it as a closed path in red, at hairline weight. If the outline has a gap somewhere, the machine stops treating it as an outline and starts treating it as an ordinary stroke, and the result can be unpredictable. With round stickers you do not have to draw the contour yourself - you pick a ready diameter and prepare the artwork alone.
The crease, meaning the fold position
A crease is not a cut. It is a groove pressed into the board so that the material folds exactly where you want it to and does not crack along the bend. Without a crease, thicker board breaks unevenly and the printed layer can split into a pale line. In the file a crease looks like an ordinary straight line in cyan, also at hairline weight, and it sits on its own layer.
The most common snag looks like this: the whole box net drawn in one black colour, because it reads beautifully on screen. To the machine, though, that is a clear instruction - cut everything. The board arrives in pieces instead of folding into a box. So the colour and the layer name are not decoration, they are the operating manual for your design - which is why red and cyan are fixed by agreement rather than left to choice.
Before you send the file, switch off the artwork layer for a moment and look at the bare skeleton. You should see only lines: a closed outer outline and straight fold lines. If anything else shows up in that view - a fill, a shadow, a doubled stroke - it will reach the plotter and produce a surprise.
Bleed, or why the artwork has to run past the shape
Bleed is artwork deliberately extended beyond the cut line. The reason is purely practical: no sheet sits in a machine perfectly to the hair, and the material moves a little. If the background ends exactly on the outline, a fraction of a millimetre of shift is enough for a white strip to appear at the edge.
So extend the background, photo or colour band a few millimetres past the outline - we will tell you the exact value for a given job, because it depends on the material. On packaging, run the bleed around the whole unfolded net, tabs included: they can peek out once the box is assembled.
The other side of the same coin is the safety margin. Move texts, logo and anything you do not want to lose away from the edge and towards the centre. Packaging adds one more rule: do not run important elements across a crease. A line of text passing over a fold breaks in half once the box is assembled and stops being readable. We take the mechanics of bleed apart in our post on bleed, margins and cut lines.
How to label the file so nobody has to guess
Tidiness in a file is not fussiness, it is one saved round of questions. This order works for most designs cut to a shape.
- Lay the design out flat - you prepare a box as a net, that is an unfolded plan, not as a finished solid. The plotter works on a flat sheet.
- Split the design into two files - one with the artwork only, one with nothing but the lines. Inside the cutting file put them on two layers named plainly: cut and crease. Names without local characters and without spaces travel through every program without surprises.
- Give the lines the agreed colours and hairline weight - red for cutting, cyan for creasing. A hairline is the thinnest line your software can draw: the machine reads the path itself, not its width.
- Check that the outline is closed and that two identical lines are not sitting on top of each other. A doubled path means two passes of the knife in the same place.
- Add bleed and pull content away from the edges, and while you are at it check that nothing important lands on a fold.
- Save as PDF at 1:1 scale - either one document with two pages (page one the artwork, page two the lines alone) or two separate files named plainly. Either way the same page size and the same origin point, so nothing needs resizing.
That last point takes half a minute and solves the most misunderstandings. What you see on screen is not always what the machine receives - we cover that in our post on the design preview and the production file.
The most common mistakes and how to avoid them
- An outline drawn as a filled shape - instead of a line you get a figure with colour inside. The plotter needs a path, not a patch. Remove the fill and leave the stroke.
- Cutting and creasing in one colour - the classic that turns a box into a set of separate walls.
- An outline drawn in pixels - a shape made in a photo editing program is not a path. The outline has to be created in a vector program.
- No bleed on the tabs - you only see it once the box is folded, as a pale gap at the edge.
- Artwork shifted against the outline - if the design and the cut line use different reference points, the print will come out offset. Both files, the print one and the cutting one, must share the same page size and the same origin point.
We have gathered a wider list of traps in our post on the most common mistakes in files sent to a printer.
Where these rules matter most
Everything described above applies wherever the shape goes beyond a plain rectangle. It counts most with packaging, because there we cut and fold at the same time, but the same file with a separate outline comes in handy for stickers cut to shape or for sleeves. For an ordinary leaflet, business card or poster none of this is needed - a separate file with lines is only made when the shape goes beyond a rectangle. It is also worth knowing that on larger runs the same contour is produced with a cutting die, and the file is prepared in exactly the same way, so a net made once will serve you later as well. You will find the technical requirements for a specific product in the file preparation section.
The whole secret comes down to one sentence: tell the machine plainly where to cut and where to fold. Two files, two line colours, a few millimetres of bleed and one sentence of description - that is all that separates a file which comes back for correction from a file that goes straight to the plotter.