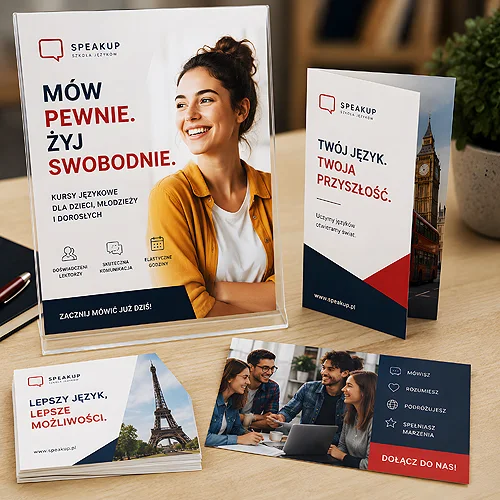
The first impression at a conference is not made on stage, but at the registration desk. That is where an attendee picks up their pack, puts on a badge and, within seconds, forms an opinion about how seriously the whole event was taken. A well-assembled set of materials works quietly but effectively - it organises the day, helps with orientation and leaves something that goes home with the attendee.
An attendee pack is not a random pile of prints tossed into a bag. It is a planned set in which every element has a job: to welcome, to guide through the agenda, to help with notes and, at the end, to confirm participation. Below we show what such a pack should contain, how to tie everything together with one theme and how to separate materials for speakers from those for attendees.
- A complete attendee pack usually includes: a folder or bag, a programme, a badge with a lanyard, a notepad, a pen, training materials, a certificate and a survey.
- Coherence comes from one event identity - logo, palette and a recurring detail on every element.
- Materials for speakers differ from those for attendees - different markings, a different scope of information.
- Navigation elements (agenda, floor plan, signage) shorten the distance between the entrance and the lecture hall.
- Small touches build a sense of professionalism, and a keepsake extends the event's life by further weeks.
What a complete attendee pack is made of
Before you settle on colours and order anything, it is worth writing out the full list of elements. That way nothing slips through, and it is easier to gauge how much design and production work lies ahead. A classic pack covers a few groups that you expand depending on the character of the event.
- Folder or bag - the wrapping for the whole set and the first element the attendee takes in hand. It sets the tone and keeps the rest of the materials in one place.
- Event programme - a folded leaflet or booklet with the agenda, speakers and the plan of the day. The most-used print throughout the entire event.
- Badge with a lanyard - name, company, role. It eases conversations and organises access to zones.
- Notepad and pen - a classic that still works, because notes on paper stick in the memory differently than those in a phone.
- Training materials - handouts, scripts and worksheets tailored to specific sessions.
- Certificate of attendance - a confirmation of participation that many attendees genuinely keep and show at work.
- Evaluation survey - short, legible, gathering opinions that will help you plan the next edition.
Not every event needs everything. An intimate workshop will manage with a lighter set, while a large conference will expand the pack with extra inserts. It is worth knowing the full list at the start, though, because you settle on one theme straight away and adding a missing element becomes a formality.
One identity across all elements
Coherence comes from repetition. When the event logo, the same palette and one recurring detail appear on the folder, programme, badge and certificate, the whole thing immediately reads as considered. Instead of choosing the look separately for each print, set a few constants and stick to them consistently.
Logo, colours, typography
Choose two, at most three colours, one typeface for headings and one for body text. The same pair of fonts on the programme and on the badge does more for coherence than the prettiest graphic used only once. Repeat the event logo in the same place - ideally in the corner of each element - so the eye ties everything into one whole at once. If you want broader context on building a recognisable style without overhauling your brand mark, take a look at our post on how to create a recognisable visual style without changing the company logo.
Navigation elements
A large part of a pack's value is help with orientation. An agenda with times, a floor plan with marked zones, legible signage for rooms and breaks - all of it means the attendee does not wander or keep asking the staff. It is worth designing the programme so the most important information - where, when, who - can be caught at a glance. When there is a lot of information, hierarchy and white space on the page bring order; more on that in our text on legibility with a large amount of information.
Before you order anything, prepare a small set of constants: the event logo, two colours, two fonts and one recurring detail. Write them down and keep them at hand as a guide for every next element. That way even an insert made at the last minute will fit in with the rest of the pack.
Speakers versus attendees
Not everyone in the room needs the same thing. An attendee wants to know where to go and what to expect; a speaker needs technical information and a clear marking that they are part of the presenting team. It is worth separating these two worlds already at the design stage.
- Badges - for speakers, set them apart with a strip colour or a role note, so staff and attendees know at once who is presenting.
- Technical materials - a speaker gets a rehearsal schedule, contact details for the production crew and equipment information; an attendee does not need this.
- Programme - the presenters' version may include extra backstage times that are absent from the general copy.
- Welcome - a short card for the speaker with a thank-you and the key arrangements works like a gesture that gets remembered.
The programme, agenda and handouts are most conveniently printed as folded leaflets or simple cards - the format is easy to match to the amount of content. Presenters' badges are nicely complemented by elegant business cards with contact details that a speaker is glad to leave after a conversation. A conference programme takes creasing well - folded flyers close down to DL or A6, and the agenda then opens into several panels printed on both sides.
Small touches that build professionalism
The impression of a buttoned-up event is born from details the attendee often will not name outright, but does feel. The same paper across the whole pack, even edges, legible print, a considered order of inserts - all of it adds up to a message: every detail was taken care of.
- One paper throughout - different paper on the programme and the certificate instantly breaks the sense of a set. Keep it shared.
- A margin of copies - a few more folders and badges than the sign-up list saves the day when someone registers on the spot.
- A legible certificate - a name, the event title and the date written clearly mean the document genuinely ends up on a wall or in a portfolio.
- Consistent signage in the space - directional posters and boards in the same identity lead the attendee from the entrance all the way to the hall.
If you want the materials not only to look good but also to stay with the attendee for longer, it is worth thinking of them as things to keep. You will find good pointers in our post on how to design a leaflet a customer will keep for later.
A keepsake after the event
A conference or training ends in a single day, but a well-designed pack can live longer. A certificate hangs on the wall, a notepad with the logo returns to the desk, and a small gift reminds of the brand for weeks. It is worth carrying the same theme onto an element that stays - because it quietly works on the memory of the event and the wish to return for the next edition.
Everything the attendee genuinely uses works here: a notepad, a pen, a small gadget or a discount card for the next meeting. What matters is that the gift carries the same identity as the rest of the pack - then it is not a detached extra, but a natural extension of the whole day. You will find the full range of prints from which to assemble such a set in our product catalogue.
A schedule without the rush
Even the best-conceived pack loses out when it is made in a panic the day before the event. Spread the work so that each element can come together calmly and go through proofreading.
- Identity first - settle the logo, palette and theme before you start designing individual prints. It is the foundation for everything else.
- Then the fixed elements - folder, notepad, badges, lanyards. You can order these earlier, because they do not depend on the final agenda.
- Variable content closer to the date - the programme, floor plan and handouts you refine once you know the speaker list and session details.
- Certificates and surveys at the end - certificates you prepare at your leisure, and the survey you print in a quantity matched to attendance.
A complete materials pack is not a matter of a big budget, but of one good idea carried consistently through every element. Set the identity, repeat it everywhere, separate the roles of speakers and attendees, take care of navigation - and the materials will take care of making your event look, from the door, as professional as it was conceived.