The visit ends, the patient stands up, and you hand them the result of all the work - images, a report, test results. It is a brief moment, but a surprisingly important one. A crumpled sheet pushed into their hand and a loose, unlabelled disc send a different signal than a tidy set that looks like someone cared about it. In a practice where trust matters, this small detail builds a sense of professionalism just as strongly as the diagnosis itself.
Handing over records tastefully is not a whim. It is a practical matter: the patient finds their results more easily, does not lose the medium, and at the next visit to another specialist brings a full set rather than single sheets. Below we show how to build such a way of handing out materials - from the medium, through the description, to a coherent presentation of the whole.
- The way results are handed over is part of the impression from the visit - worth caring for just as much as the records themselves.
- Match the medium to the content: a flash drive for large files and images, a disc for archival imaging studies and the standard a next specialist may require.
- Label every medium clearly - patient name, date, type of study - so nothing gets mixed up.
- A folder or case ties paper and the medium into one set that is harder to lose.
- Coherent presentation with the practice logo works like a discreet business card that stays with the patient longer.
Why the form of handover matters
A patient remembers not only what they heard, but also how they were treated. A tidy set of documents says without words that the practice works diligently and attentively. The opposite - a pile of loose sheets and an unlabelled disc - leaves an impression of haste, even if the visit itself was exemplary.
There is also a purely practical side. Test results travel between specialists - the patient takes them to the next doctor, to the hospital, sometimes puts them away for years. If the materials are labelled and kept together, each next person finds their way around them faster. That saves time and reduces the risk of something getting lost along the way.
Choosing the medium: flash drive or disc
The choice of medium depends on what you are handing over and to whom. There is no single right solution for everything - it is worth knowing the strengths of each and choosing deliberately.
When a flash drive
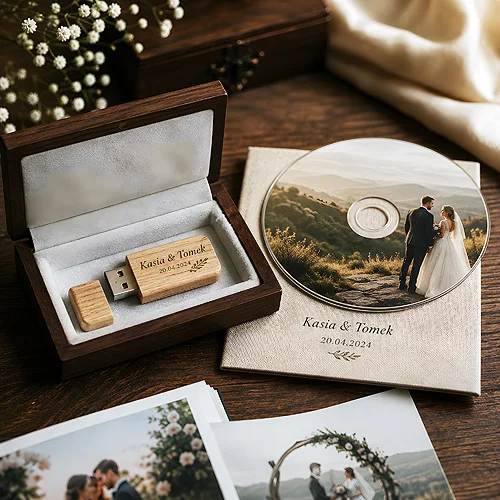
A flash drive works well for large files, high-resolution images and materials the patient will want to open on any device. It is handy, durable and looks modern. Promotional printed flash drives with the practice logo also act as a discreet business card - the patient carries them on their keys or in a bag, and along the way keeps the name of the place where they are treated close at hand. For carrying on a keyring the Twister copes well: the connector tucks away on a 360 degree swivel, so there is no cap for the patient to lose.
When a disc
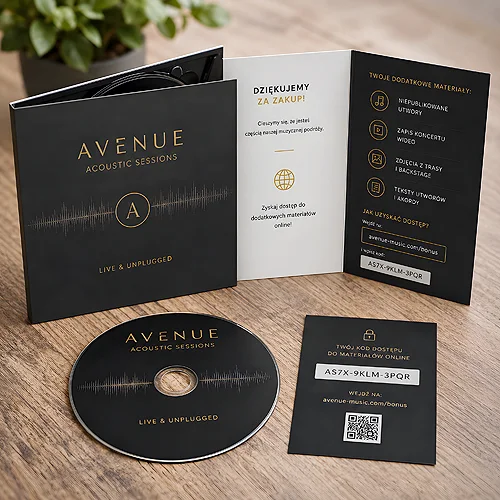
A CD or DVD is still the standard in imaging studies - some facilities and systems expect it outright. It works well as an archival medium: written once, it sits in the records and waits. A tasteful disc print with the practice name, study type and space for a date means that even after years it is easy to recognise what is on the disc. That is a big difference compared with a disc labelled with a marker.
Before you settle on a medium for good, ask where your results end up. If patients most often take them to a facility that accepts imaging studies only on disc, the disc stays the basis. If you mostly hand over images and files for home use - a flash drive will be more convenient. Many practices simply offer both and ask the patient what they prefer.
Clear labelling and order
Even the best medium is useless if no one knows what is on it. Labelling is not decoration but a foundation of safety - thanks to it results do not get mixed up between patients, and the patient themselves easily finds the right file months later. Stick to a few constant rules.
- Patient's full name - the basics that eliminate mistakes when handing over and archiving.
- Study date - lets you arrange results chronologically when there are several from different visits.
- Type of material - a short note whether it is images, a report, or an imaging study.
- Practice name - so the patient knows where the medium came from and has the contact at hand.
It is worth carrying the same information onto the packaging - an envelope, a case or a folder cover. That way you do not have to take out the medium to check whose it is and what it concerns. A simple, repeatable labelling layout on all materials from the practice brings order for you.
Coherent presentation of the whole set
Paper separately, disc separately, images somewhere else again - that is the easiest way to lose something. It is worth binding the whole into one set the patient takes and keeps together. Here presentation matched to the practice comes to the rescue.
A good solution is branded printed folders with space for documents and a pocket for the medium. The patient then gets not a stack of loose elements, but one closed whole with the practice logo. Such a set is harder to lose, looks professional and stays with the patient longer than a single sheet. If you want to see how to combine the medium with records in one presentation, take a look at our post on a folder with space for a disc and records.
The whole idea rests on one principle: coherence. When the print on the flash drive, the label on the disc and the logo on the folder keep to the same palette and the same mark, the patient immediately sees it is a set from one place. If you are wondering whether a flash drive can replace the classic set of disc and paper, you will find more in our post on a flash drive with test results as an alternative to a disc.
How to roll this out in your practice step by step
Changing the way you hand over records does not have to be a revolution. It is enough to organise it once and stick to the pattern. Here is a simple order that works in most practices.
- Establish what you hand over most often - images, reports, imaging studies. This decides the choice of medium and presentation.
- Pick one main medium - a flash drive or a disc - and possibly a second as an option for patients who need it.
- Design a coherent print - logo, practice name and fixed fields for data, repeated on the medium and the packaging.
- Choose the presentation - a folder or case with space for documents and the medium, in the same style as the rest.
- Introduce a simple labelling scheme - patient name, date, type of material - and keep to it with every handover.
Once such a scheme is in place, a new patient gets a tidy set in seconds, and staff do not wonder each time how to pack it. If you want to browse the available media and packaging or ask about a print tailored to a specific practice, take a look at the full range or write through the contact form - we will suggest what works best in your case.
The way you hand a patient their results is the final chord of the visit. A cared-for, labelled set bound into a whole stays in memory long after the patient walks out the door - and says more about the practice than many a banner in the waiting room.